So this last weekend I was an exhibitor at UtopYA(UtopiaCon) con in Nashville, TN. While there I met a lot of awesome people, sold some book and of course gave out some swag. I had book marks, cards and candy, but the most popular thing that I had were book charms.
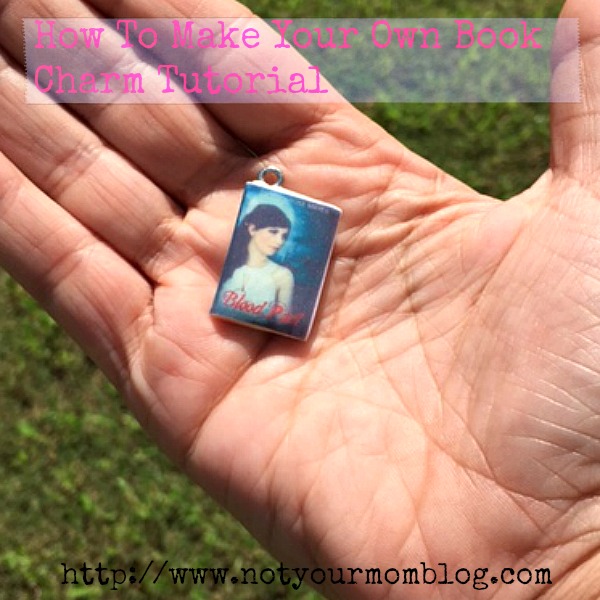
My sister and I had made the book charms ourselves so I decided to put together this tutorial to show you guys how you can make your own book charms for events and well for a fun craft. If you are a writer you can use your own cover wraps or if you are a fan you can use your favorite books.
Supplies Needed:
- 1 – Bar of poly clay (we got around 100 out of the middle size bar from Hobby Lobby)
- 10 mm screw eye hooks for jewelry making
- Mod Podge
- Computer/Printer to print out wraps
Optional are: jump rings, key chains, pliers and jewelry to attach them too.
How to make them:
I will be honest and say that we didn’t have a scientific or clear direction. The first time we winged it and came up with a easy way to do it.
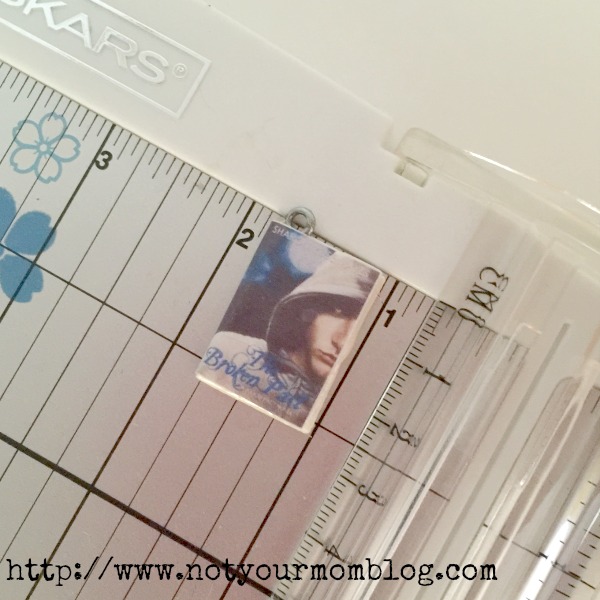
- First print out your book wraps. If you have a PC the best way to do this is open your book wrap in photo preview and choose the print option. You will choose the option that is about 1 inch wide and has about 3o wraps on the page. And then cut all of them out.
- After this we pre-heat the oven to 325 degrees and then start to knead the clay to make it soft. Yes, yes I know this is a lot of work and your hands start to hurt, but to get them to shape the clay needs to be soft and kind of flat. Remember, our covers are only about 1 inch X 2.5 centimeters folded in half.
- Okay we got one of our wraps that we printed that we didn’t care about getting messed up and started laying it over our soft clay and used a knife to cut them out. Not a perfect measuring tool, but it works for the shape and size of the covers.
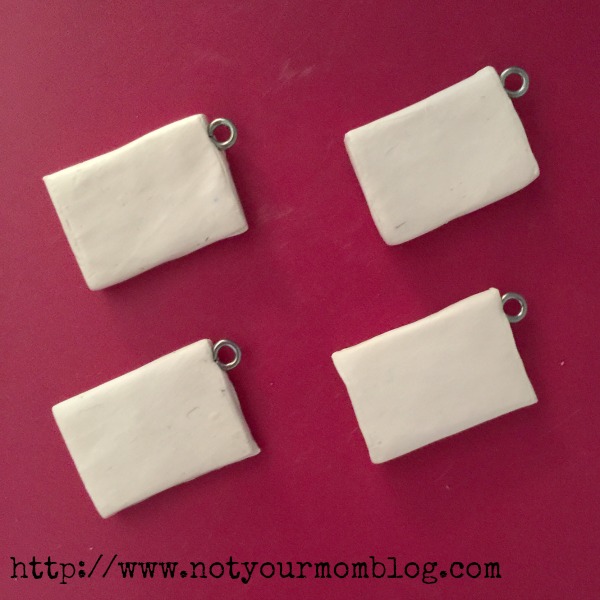
- As we got our clay shaped we would put our eye hooks in the top. So that they will stay, they must be baked inside of them.
- Then we put our shaped clay books on a piece of wax paper on a cookie sheet and baked them in the oven for 10 minutes. Only ten minutes, apparently a demon or something comes out of the oven if you do it too long. I don’t really know, but I didn’t want to mess up the clay and do it too long.
- When the oven dings, take them out and move them and the wax paper off of the cookie sheet and allow them to cool. If you are as speedy as my sister at this, then you will have more ready to go in the oven. Did I mention that she was awesome at this part and that I sucked? Like big time.
- Okay now after they cool comes the fun part, because well who doesn’t love some Mod Podge? Okay so how I did it was I used a paint brush and brushed over the hardened cool to the touch clay and then stuck the book cover to the clay. Be really careful during this step, because you will mess some of your covers up and have to print more.
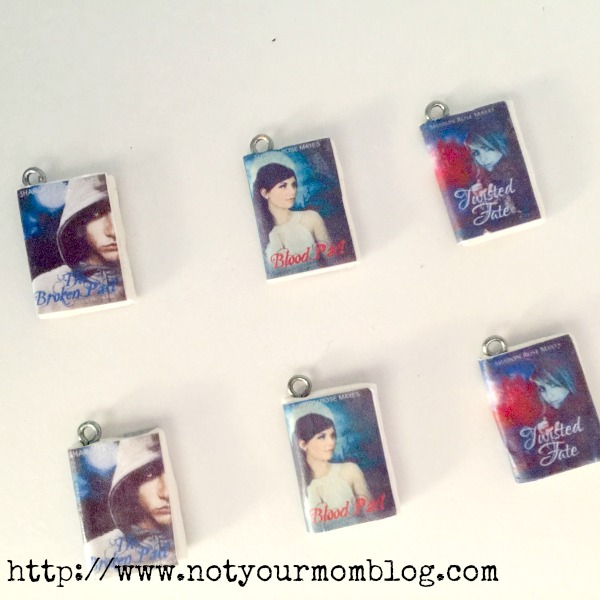
- We did a lot of trial and error with this part the first time we used a paint brush and did several coats of Mod Podge on the outside, but after the first time we discovered Mod Podge in a spray can. Seriously, best stuff ever. So we used christmas ornament hooks and hung the covers on a clothes hanger and sprayed the charms. It took a few coats and you have to allow them to dry a few hours between coats. I also don’t suggest doing this indoors. You will mess some stuff up and then the fumes aren’t awesome.
So basically after you do all of those steps you can get creative and add jump hooks to turn them into keychains, bracelets, necklaces, and even attach them to bookmarks. There are tons of possibilities.


Speak Your Mind